
Because green is my favorite color and my old black dresser was in SERIOUS need of a makeover…


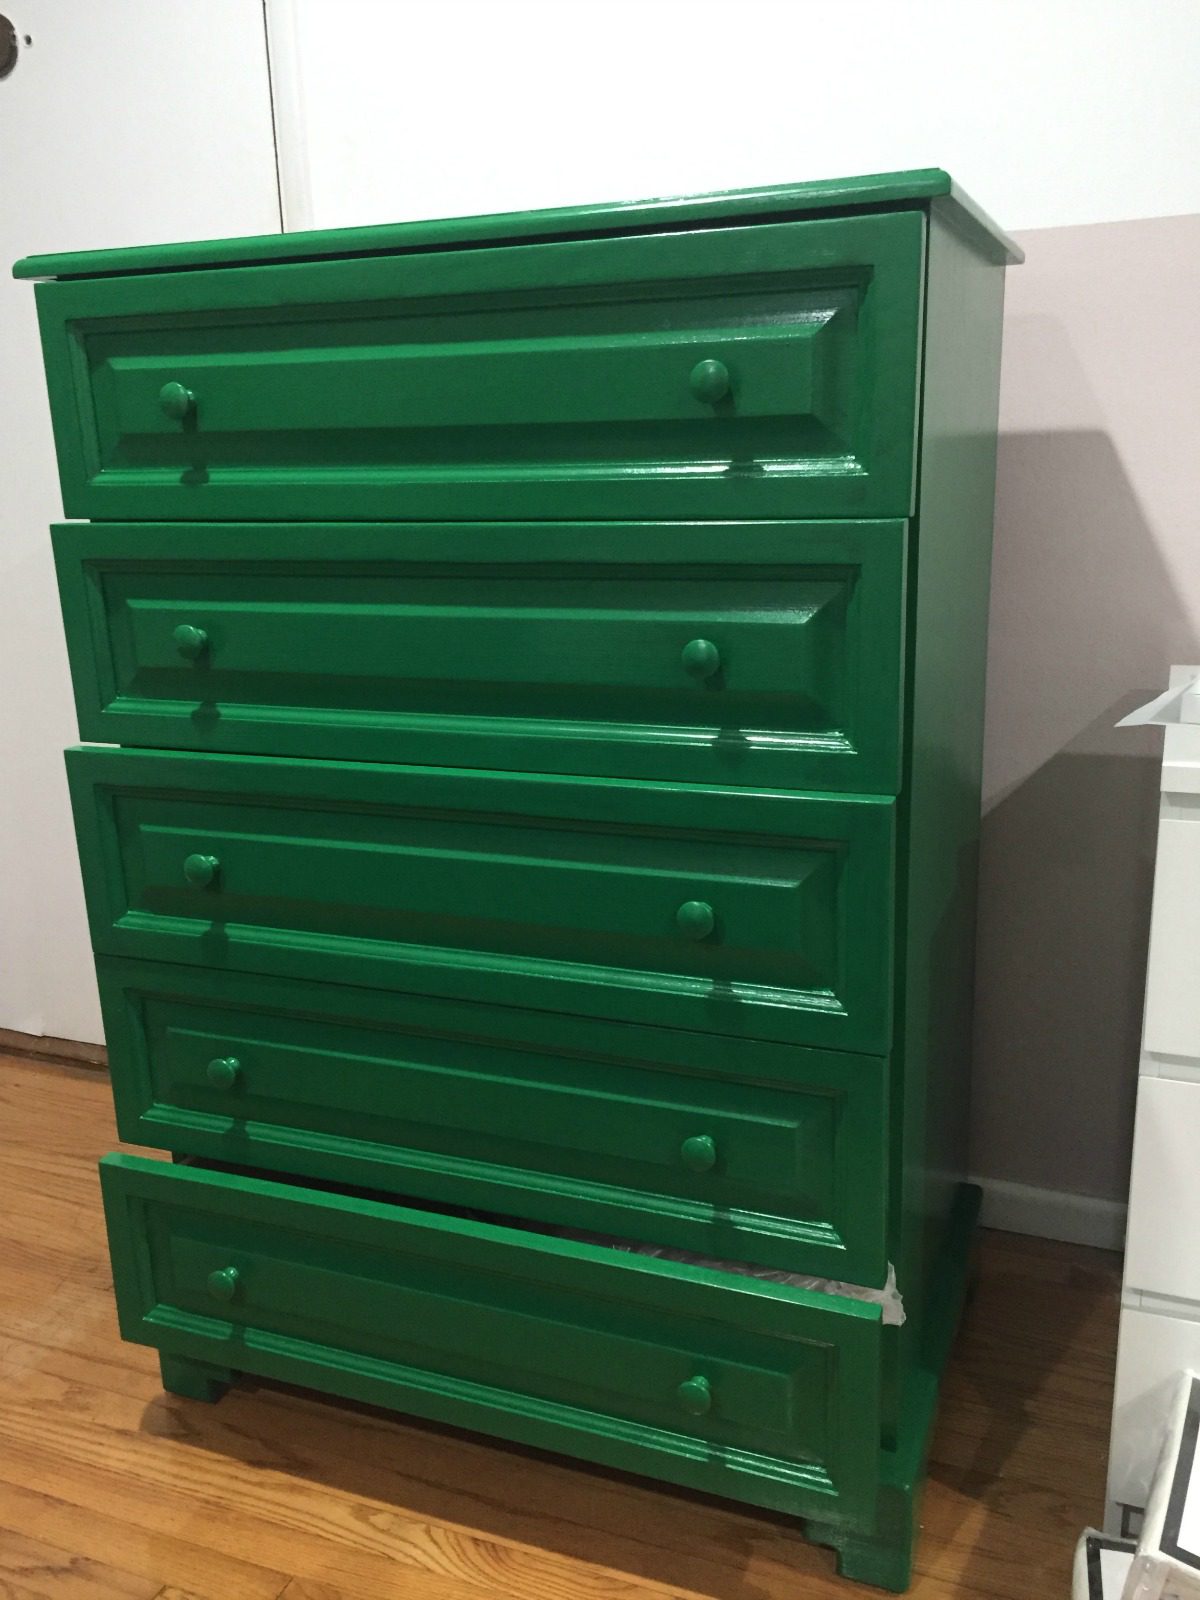
How To DIY a Green Dresser
Let’s rewind back to 2007 when I moved into my Gramercy apartment in Manhattan. I needed a new dresser and insisted that it could only be black and, you know, not a giant piece of sh*t like my previous dresser. Back when I was that age I really had no clue about how to buy furniture (I’m still basically learning), but I knew I wanted a black dresser that was made from real, actual wood that wouldn’t fall apart and I only wanted to pay $600 max, which I did.
I wish I could remember the exact company that made this dresser since it really is a quality piece of furniture (I want to say it’s this company, but their site examples look way fancier than mine) but, alas, I forgot over the past decade. I managed to move this dresser across the country, and to two different apartments in LA; but but by the time it arrived in my second LA apartment (pictured above), the dresser was…um…not looking so hot. It had scratches on the bottom from wear and tear and the black was kind of fading on top. Not to mention the fact that I was kind of just sick of looking at it after 10 years, you know?
Buying a New Dress is Expensive
I thought about buying a new dresser but the thought of shelling out a TON of money (seriously, well-made dressers are EXPENSIVE; $600 was a steal back then)…then my friend Mary suggested re-painting my current dresser. “Hmmm, I like this idea,” I thought. This way I can keep the dresser (#nostalgia) AND I’ll save money be just giving it an “easy” DIY. Well, I did get to keep the dresser for my nostalgia, I WILL say that, lol (more on the other two “plus factors” later)…
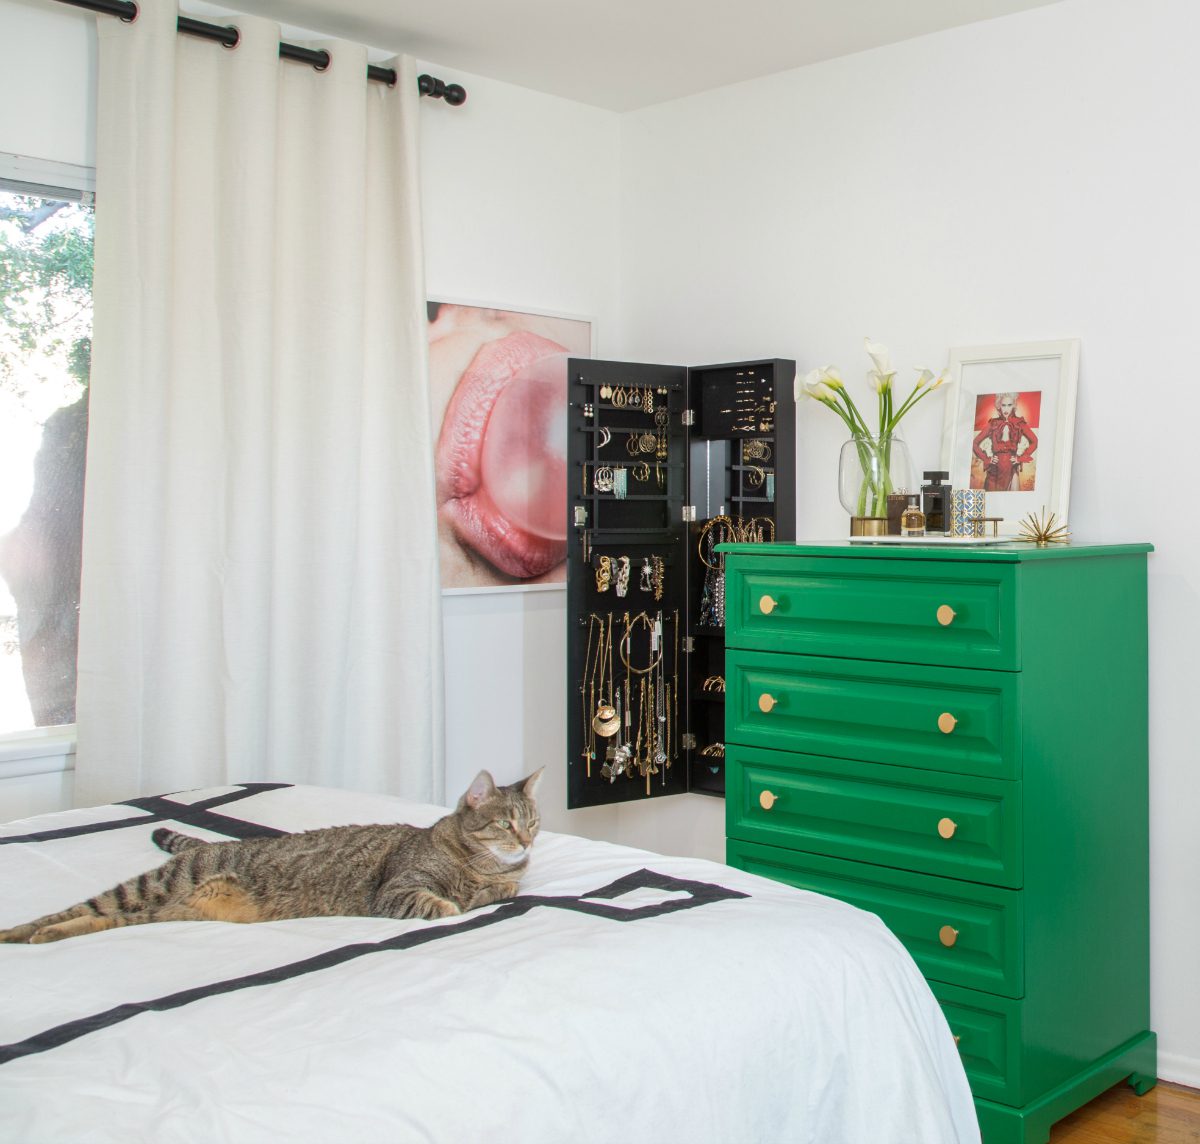
After a lot of thought and chatting with Mary, I really had my heard set on a bold, bright green. I told my designer, Dee Murphy, about the idea and she was ALL about it. She stopped by a paint store and grabbed some swatches of a few different greens she liked and I ended up settling on Benjamin Moore Amazon Moss. Believe me, I didn’t take this decision lightly…I spent many hours on Pinterest (this image was my main inspiration) looking up other DIYs with that color just so I could see what the final results (on wood) would look like.
A fun fact about paint: it comes in different finishes. Who knew, right?! Not me. I went to the hardware store to buy the paint for my living room wall AND the paint for the dresser, and even though I thought I was fully prepared (I had the names and what else would I need?), I was then faced with the biggest question of them all: “what finish for each paint?”
HUH?
Luckily Dee was quick to text back and instruct me what to get, and I settled on getting the green paint in “semi-gloss” since I did want a bit of shine. If you’re as confused as I was/still kind of am, this site explains the differences well and I wish I had read it before going to the hardware store!
Four things I learned from this dresser DIY:
“Re-painting” furniture isn’t just slapping on a fresh coat of paint:
I ended up hiring a professional room/house painter. After talking to a super unhelpful man at my local hardware store (shout out to Koontz Hardware!), I figured out that it really does need to be sanded (you know, with a sander and not just sandpaper) and would likely need several coats of paint.
Paint and labor hours add up:
I originally thought I could do this DIY for around $200. Wrong. Big time wrong. The paint wasn’t crazy expensive. But I ended up needing a full quart (because of all the coats). Then when you add in labor hours (about $50/hour), it ended up costing me close to $600. How’s that for IRONY? My $600 dresser cost me another $600 for its makeover!
This isn’t something you can do if you don’t have outdoor space to work:
I’m really fortunate that I have free space around my pool. Also, that I have cool neighbors who didn’t care that my painter was sandblasting for a few hours spread out over two days. If I wanted to do this in my old apartment, I would’ve been reallllly out of luck. I had no outdoor work area to use…sorry, city dwellers.
Always start painting in the morning:
If you do have outdoor space to work, don’t be an a-hole like I am. Don’t tell the painter to come over at 3pm. Hint: when the sun goes down, you/they won’t be able to see how the paint is coating. It’ll be difficult to know when the paint is dry enough to move the furniture back inside. Yep. That was fun.
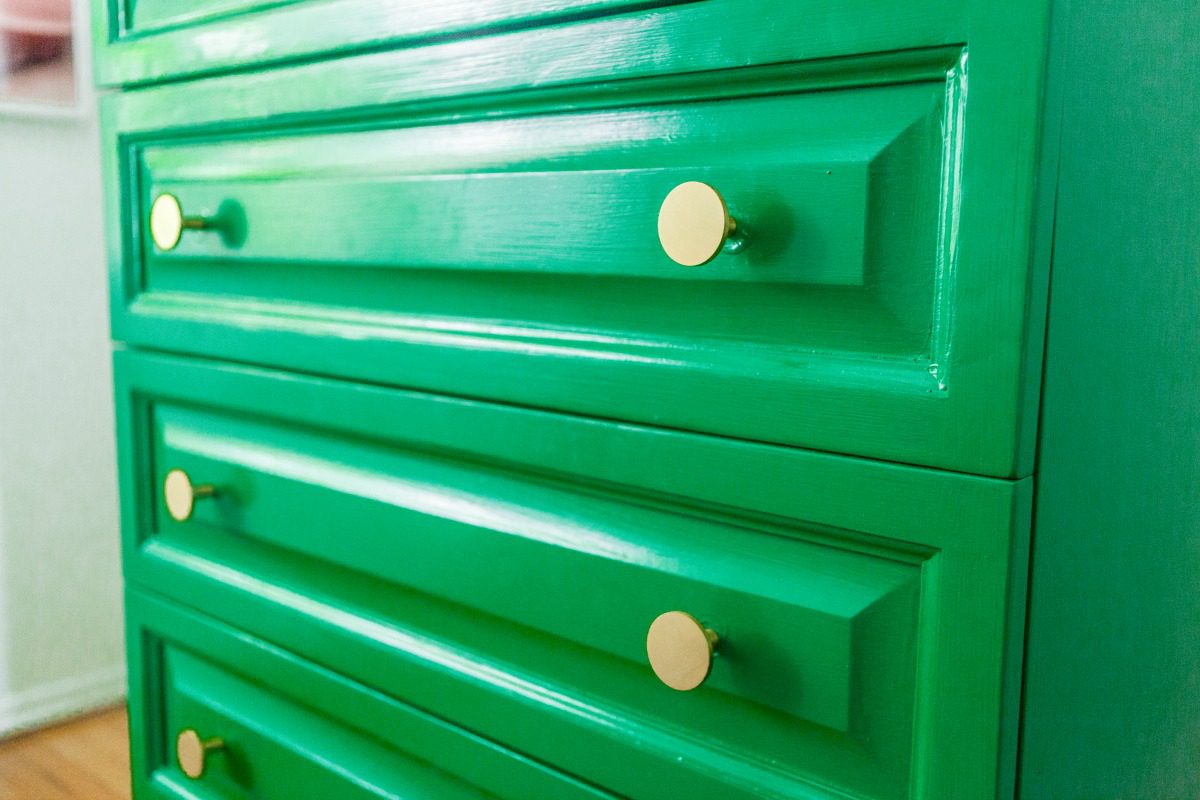
Once the dresser was painted (about four coats!), my painter removed the original wooden knobs and attached these gold circle brass knobs that Dee helped me pick out. In my opinion, the knobs really MAKE the revamp.
What do you guys think?!
And p.s.- I have one more apartment DIY coming soon!

You can see my FULL apartment tour here 🙂

SHOP


Love your jewelry organizer. Where did you get that? And the dresser is gorgeous.
Thank you! It’s linked in this post 🙂
http://honestlyjamie.com/west-hollywood-apartment-tour/
Pingback: West Hollywood Apartment - Video Tour - Honestly JamieHonestly Jamie
Pingback: How to DIY Improve a Painting - Honestly JamieHonestly Jamie